
WebDesk Quick demo: https://youtu.be/sUkge29z4HA
WebDesk Files
Uploading Files
Two options are avalable for file upload.
- Drag the file to WebDesk Files from your computer
- Click the upload button
Manual Upload
Working with files & folders

For file & folder operations your must first click the information icon associated with the file, pictured to the left. This appaears to the far right of the file.
Locking files
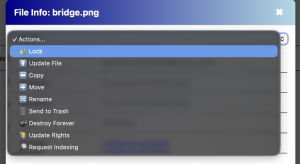
Locking a file is a easy way to prevent other users making modifications to a file you are working on. By default a file is locked for 10 minutes before an automatic unlock occurs, you can also manually unlock a file when you are done processing it. To lock a file:
- Click the file information icon
- Select Lock / or unlock from the file action menu.
Working with file versions
File versions provde a history for each file, past versions however can be automatically deleted by the system based on your orgnaizations policy. Versioning happens automatically, when a new file is uloaded to the folder any existing file with the same name moves down the virsion list with your new file moving to the top of the version list. The version number displayed in the file browser indicating the current version of the file.
How to view an older version of a file
- Click the file information icon
- Click the the Version X (click to manage) text
- Download the version you wish to view to your local machine
Bringing back an old version
- Click the information icon
- Click the the Version X (click to manage) text.
- Clck the “promote” button next to the version you wish to restore.
After this procedure a copy of the old version will be crearted as a new version of the document. For example, if the current version is version 5, and version 3 is promoted, a new version, version 6 will be created with a copy of version 3. Both version 3 and 6 now exist on the system and are identical.
Old verson removal
The system adimistrator can configure how many old versons of a file remain on the system. However as version removal typically occurs at 3am versions beyond the limit may be on the system for download or restoration.
Deleting a file
- Click the information icon.
- Click “Send to Trash” from the actions menu.
The file will be moved to the trashcan for that folder and remain there for a system defined period before been removed forever. All versions of the file will also be moved to the trashcan when the master version is moved. When in the trashcan the deleted file will have chracters append to the name making it uneque.
Restoring a file from trash
To restore a file from tash use the move or copy functions outlined in the bellow.
Deleting a file forever
If the orngiazation has granted you the apporeate rights it is possible to delete a file, and all versions of the file forever. This action bypasses the trachcan completely. It is also important to note that this process is not receresble and your fille cannot be recovered after this action. However this is the prefered method to remove files that contain confidential information.
- Click the infomation icon
- Click “Delete Forever”
- Confirm the warning message.
Working with rights

Rights can be administered by clicking on the rights icon, or from the file / folder actions menu. You will only be able to modify rights if you have adminsitrator rights to the current level in the file system. Rights can be assigned on a user or group bases however, it is preffered that rights are assigned to groups as this is a better security practice in most cases. By default when adding a new user or group all rights are enabled, the unwanted rights must then be toggled the toe off position.
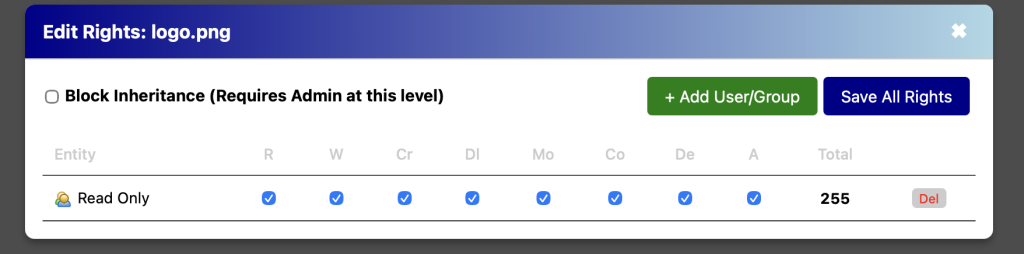
The rights are deffined as follows:
| Right | Use |
| Read | Enables read access. |
| Write | Can write to the file. |
| Create | Can create a new file. |
| Delete | Can delete the file. |
| Move | Can move the file. |
| Copy | Can copy the file. |
| Destroy | Can destory the file. |
| Admin | Can assign rights to the file, additionally provides all other rights be default. |
In the file system rights flow down, for example Write rights to \folder1 provides write rights to folder1\folder2 by default. To prevent this “Block Inheritance” can be enabled stopping the flowdown of all rights. This logically creates a seperate segment of the file system. However this option also blocks the flowdown of admin rights, therefore if an admin is not defined at the lower level you will loose all access to the level. Therefore an admin should be defined at the lower level before this feature is enabled. No warning will be provided if an admin does not exist at the lower level!.
Indexing a file
For a file to be searcable it must first be indexed by the system. Indexing occurs automatically every 10 minutes by default, thefore changes to a file or new files may not be searcable right away as indexing is a system intensive process. Indxing however can be requested from the action menu if you feel the file is missing critcal data from the search. This will prompt the system to index the file again in the next 10 minutes.
Moving a file
From the file actions menu select “move”
Two new options will now appear on the menubar of files, a drop icon and “cancel paste”.
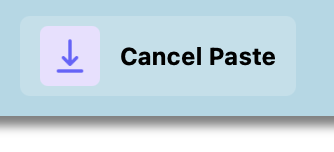
- Click the drop icon to move the file
- Click “Cancel Paste” to cancel the move
Copying a file
From the actions menu select “Copy”
- Select the drop icon to copy the file.
- Select “Cancel paste” to cancel copying.
- If a a file with the name already exists copy_x is added to the name.
Renaming a file
- Select “Rename” From the action menu.
- Provide a new name for the file or folder.
Searching
- Provide a search phrease in the search bar – top right hand corner of the files application.
- Press enter.
- Click the icon or name to preview the result.
- Click the Location to open the results folder
Some important notes
- Search will only return information about documents you have access to.
- Search will look inside files and perform text recognition.
- New documents may not be searchable right away.
- Unsupported or encrypted documents will not be searched.